4. Quick Start
This section will quickly introduce you to the structure of Modelur4Rhino's User Interface. Getting to know its logic will help you easily integrate it into your regular workflow.
Initialize Modelur4Rhino
Once Modelur4Rhino is installed you have two options to initialize it. First option is to click on the blue icon in Modelur4Rhino Toolbar. This toolbar shows up once Modelur4Rhino is installed (Figure 3.01).

Second option to initialize Modelur4Rhino is to command Modelur. (Figure 3.02).

Once Modelur4Rhino is initialized, its user interface is opened. Modelur4Rhino's main User Interface (UI, Figure 3.03) is composed of three parts: Menu, Tabs and Panels.
User Interface Overview
Menu
Menu is located at the top of the User Interface. It is the place where you go to when you want to save data (e.g. export Urban Control Indicators), change preferences (e.g. Language) or get some help (e.g. open this User Guide). Detailed description is available in the Menu section.
Tabs
Tabs are located below the Menu. They represent a groups of similar tasks. Currently there are four of them: Whole Plot tab (a place to set default values for the whole plot), Land Use tab (a place to create and edit Land Uses and their parameters), Building tab (a place to modify selected Buildings) and Survey (a place where you can monitor achieved Urban Parameters, such as FAR, required Parking Spaces, etc.). Detailed description is available in the Reference section.

Panels
Panels are the windows inside each tab. They represent a group of related parameters (e.g. Plot Parameters or Land Use Requirements). Detailed description is available in each of the corresponding Reference section.
Quick Start Guide
Before you start
Make sure you have installed Modelur4Rhino and quickly check out the structure of Modelur4Rhino User Interface, so you get acquainted with basic terminology and UI logic. It should not take you more than two and a half minutes. :-)
Step 1 - Initialize Modelur4Rhino model and configure it
Let's start from the very beginning. With Rhino open you can initialize Modelur4Rhino by clicking on a blue Modelur4Rhino icon in toolbar or command Modelur (as shown in Initialize Modelur4Rhino section). Once initialized, go to Options menu to set Modelur4Rhino UI Language according to your needs (Figure 3.04).

Step 2 - Create Modelur4Rhino Building
Once Modelur4Rhino is initialized and set up, you can create Modelur4Rhino Building by either clicking on a yellow Modelur4Rhino Building icon in the Toolbar (1) or by clicking on the Create button (2) inside Building tab of Modelur4Rhino user interface (Figure 3.05).

Regardless of which way you choose to create Modelur4Rhino Buildings, there are always two options - you can create a Building based on a predefined floor plan or based on what you draw. We will take a look at these two in the following paragraphs.
Creating Building based on predefined shape
If nothing is selected in your .3dm model, Modelur4Rhino will create a Building with predefined floor plan. In the current Modelur4Rhino version, you can create only square based floor plan (Figure 3.06).
When new Building is initialized this way, it is created based on the default Parameters as specified for the Whole Plot or Parametric Maps (if defined). We will take a look at those later.

Creating Building based on specific floor plan shape
More commonly, you will want to create your own floor plan and create Building based on its shape. To do this, simply draw a horizontal closed curve (Modelur4Rhino will select it automatically if it is being created) using standard Rhino's procedure, or select existing closed curve, and click on Create Building button (Figure 3.07). This will create a new Modelur4Rhino Building based on selected curve and default parameters.

Step 3 - Changing the Parameters
Parameters work hierarchically in Modelur4Rhino. This means that the object (eg. Building) first looks if its parameter in question (eg. Number of Storeys) is defined. If yes, it uses it. If not, it uses the Parameter from its parent object, which is either a Complex Building (if the Building is part of Complex Building) or City Block. If the Building finds the parameter value in its parent object, it uses it. If not, it looks further up all the way to the Whole Plot, which is a top-most object in Modelur4Rhino and holds all Parameters needed to define a Building (Figure 3.08). In current Modelur4Rhino version on Rhino City Block is not provided.
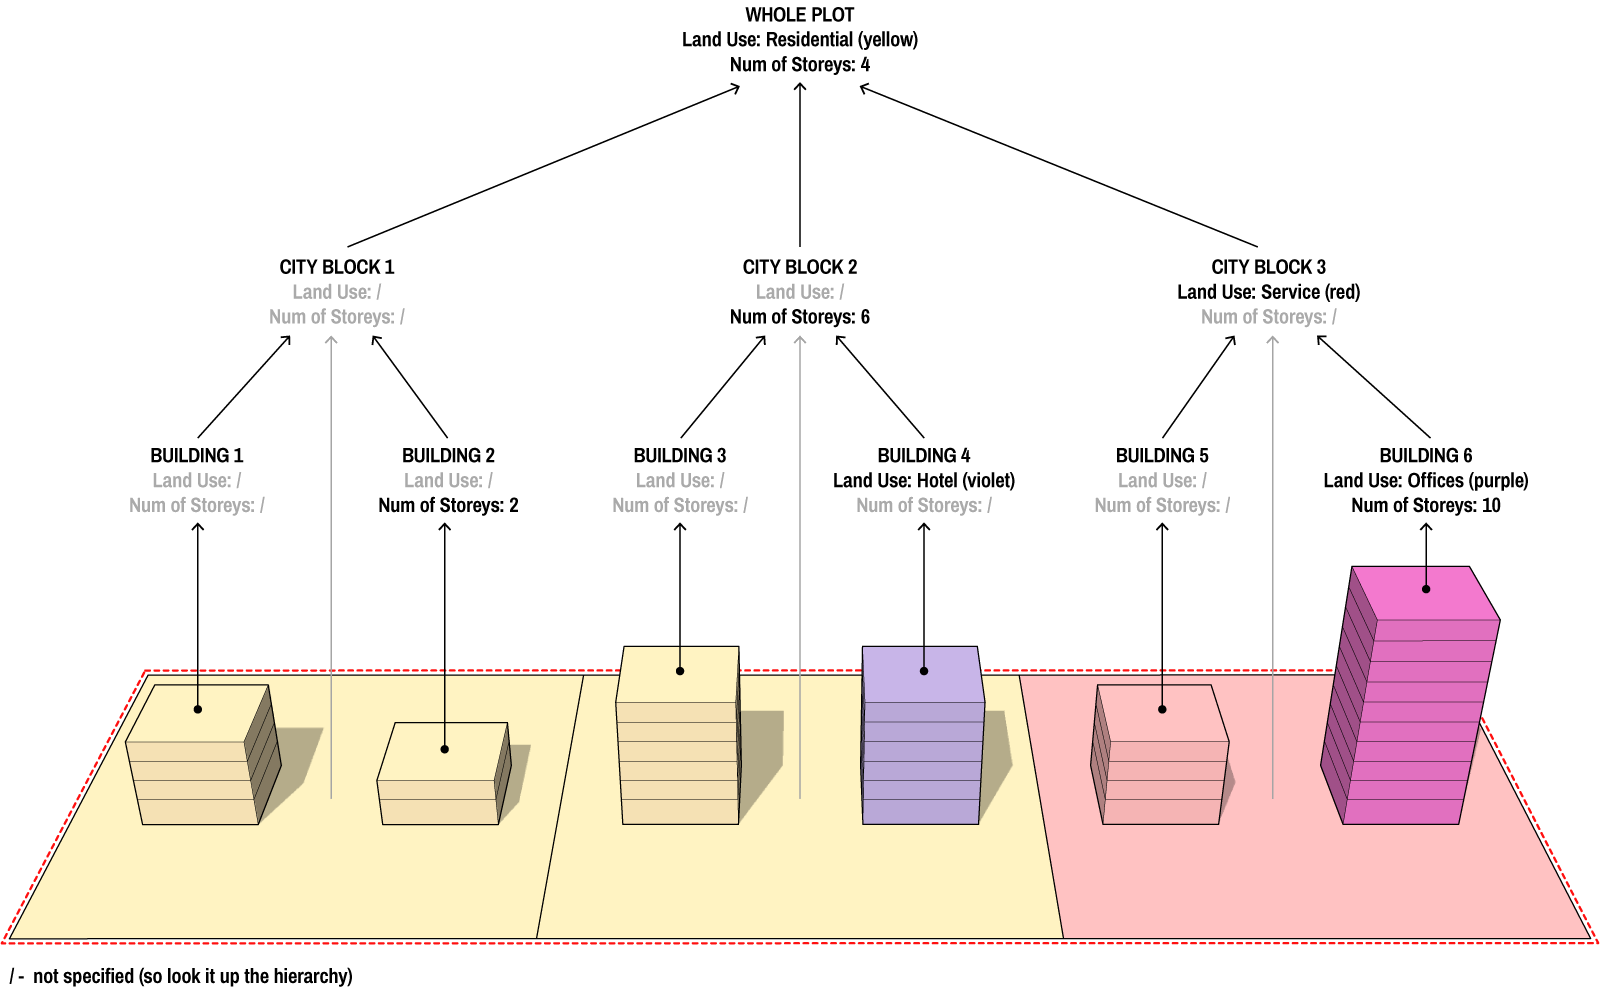
Explanation: BUILDING 1 has no parameter defined, so it looks it up from its parent, CITY BLOCK 1. Since CITY BLOCK 1 also has no parameter specified, it looks it up from the WHOLE PLOT, where it finds both parameters, which are in turn applied to the BUILDING 1. On the other hand, BUILDING 2 has specified Parameter for Number of Storeys (2) so it looks no further. But it's missing Land Use Parameter which can again be found in the WHOLE PLOT.
Now that you understand how objects hierarchy works in Modelur4Rhino, all you need to remember is the hierarchy order itself (bottom-up): Building → Complex Building → City Block → Whole Plot.
Overloaded Parameters
From now on we will call the Parameters that are defined for specific Buildings "overloaded" Parameters. This term applies only to the specific Parameters of specific Buildings. Eg. when we define Parameter for Number of Storeys in Building A, but not in Building B, only the Building A has overloaded parameter for Number of Storeys. We can quickly check which Parameters are overloaded by selecting the Building in question and opening Building tab in Modelur4Rhino User Interface (Figure 3.09). There - under Selected Building Parameters panel - all overloaded Parameters are checked and ready to be changed. This is also the place to initialize overloaded Parameters. If we want to change, eg. Land Use of the Building, go ahead - check it and change its value.
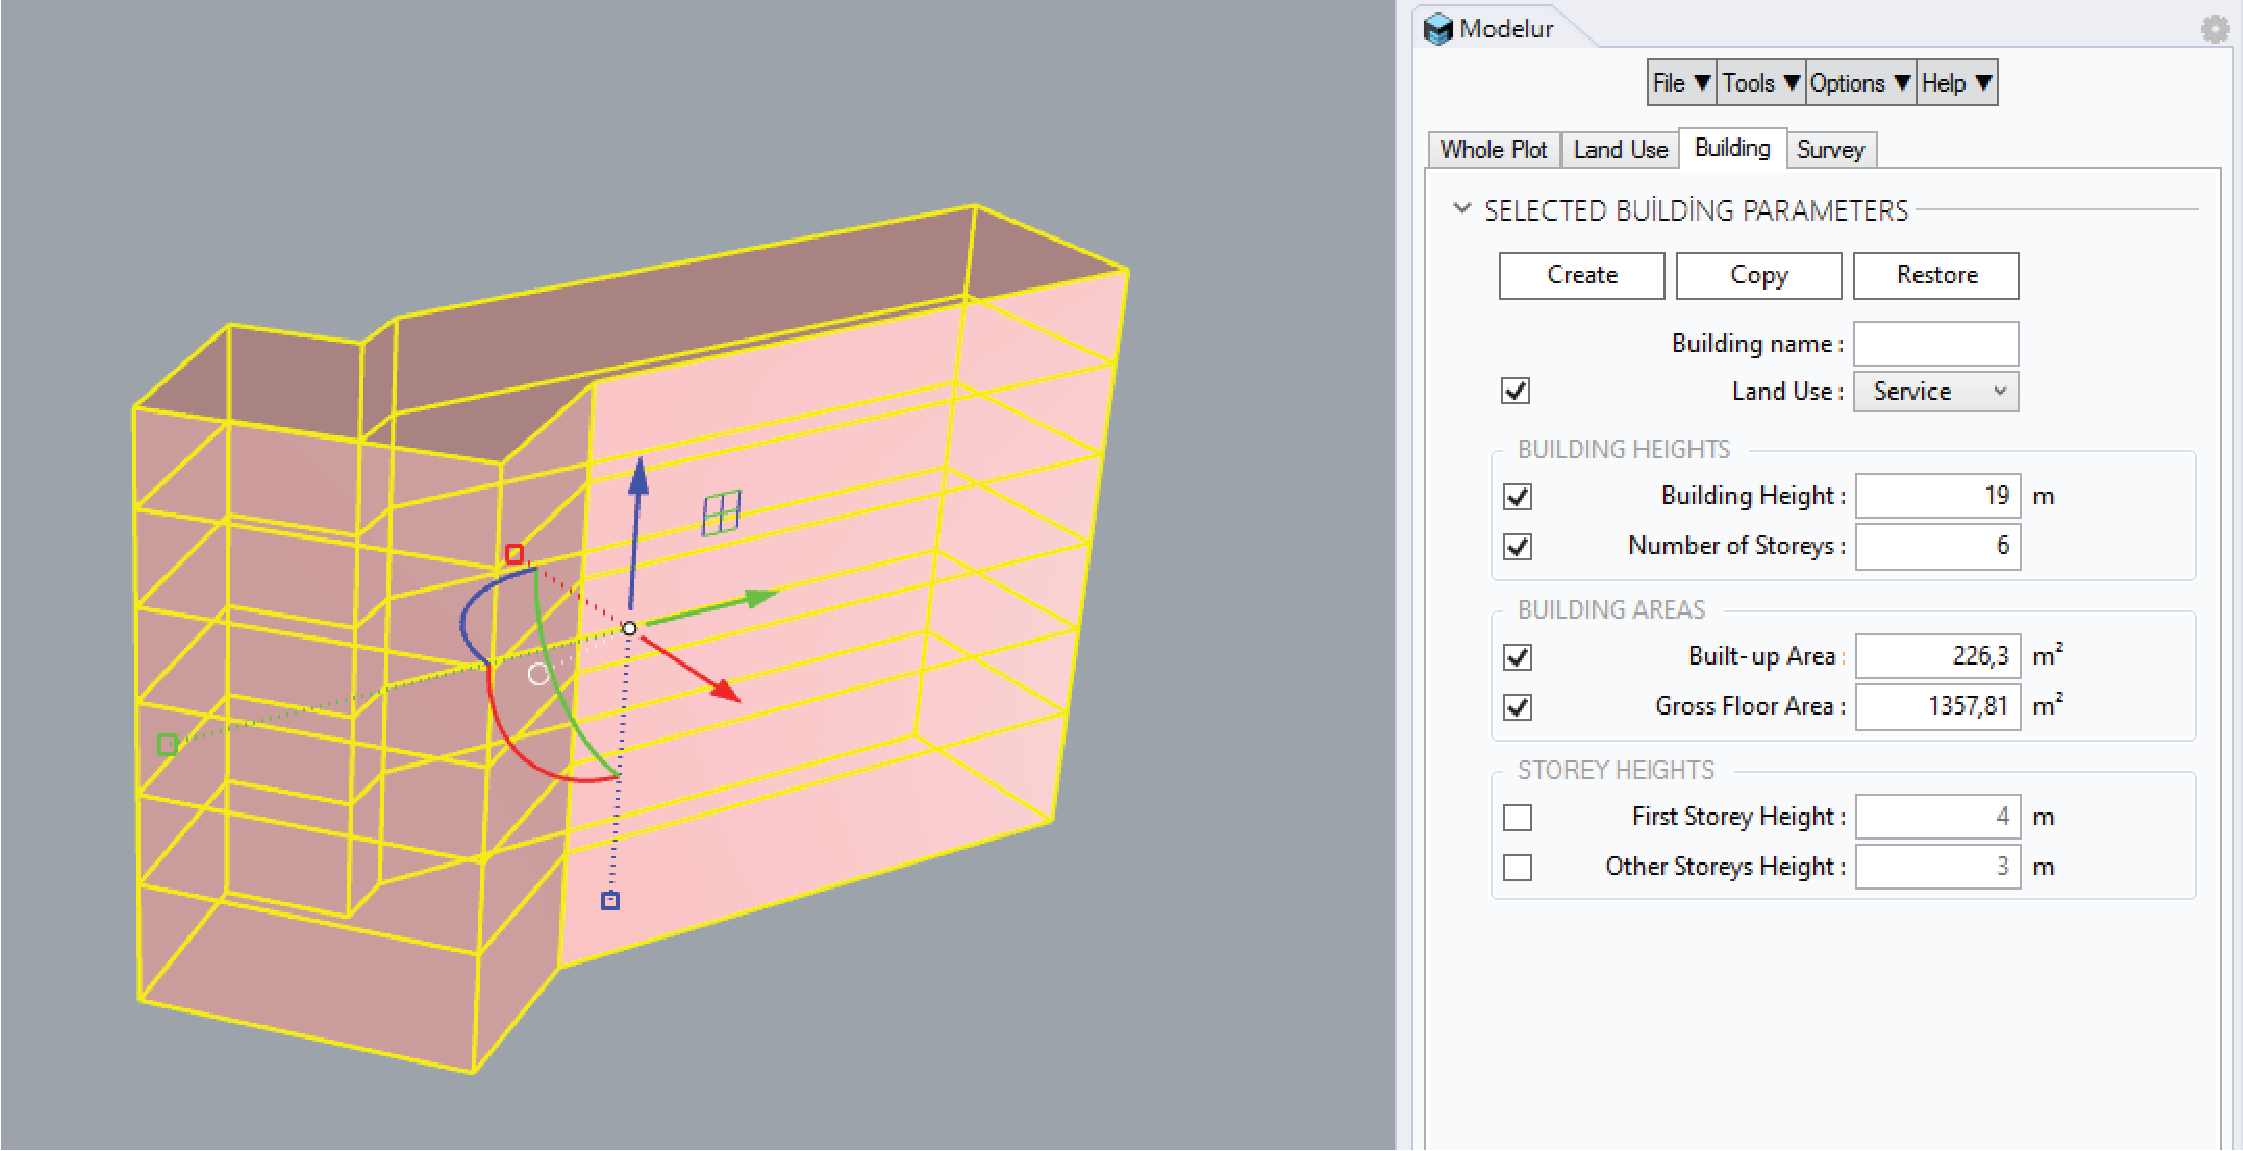
Please note that overloading / changing one Parameter might also overload other, connected parameters. For example, when you overload Number of Storeys parameter, this will also overload Building Height and Gross Floor Area Parameters, as they are directly connected to Number of Storeys. In other words, when Number of Storeys change, Building’s Height and Gross Floor Area change, too.